


Overview
The Sales Orders module is used to create, manage, and track customer sales orders. It allows users to record customer details, add products or services, define delivery information, calculate order totals, and save or print the completed sales order.
Navigation:
Inventory → Sales Orders
Sales Order List
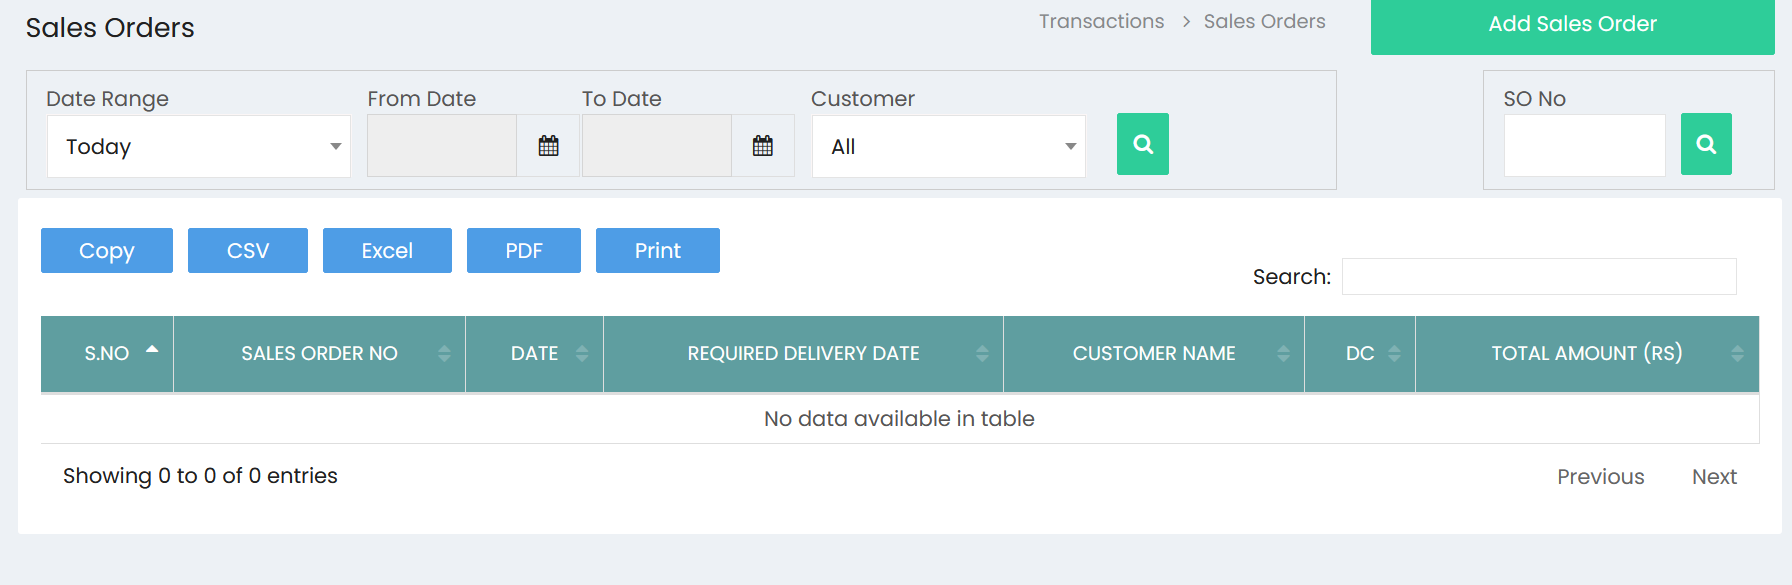
The Sales Orders page displays all created sales orders and provides filtering, searching, exporting, and printing options.
Available Filters
Use the filters at the top of the page to locate specific sales orders.
- Date Range
- From Date
- To Date
- Customer
- SO No
Click the Search button after selecting the required filters.
Sales Order List Information
Each sales order displays the following information:
- S.No
- Sales Order No
- Date
- Required Delivery Date
- Customer Name
- DC
- Total Amount (Rs)
Available Actions
The following options are available on the Sales Order List page:
- Copy
- CSV Export
- Excel Export
- PDF Export
- Search
- Add Sales Order
Creating a Sales Order
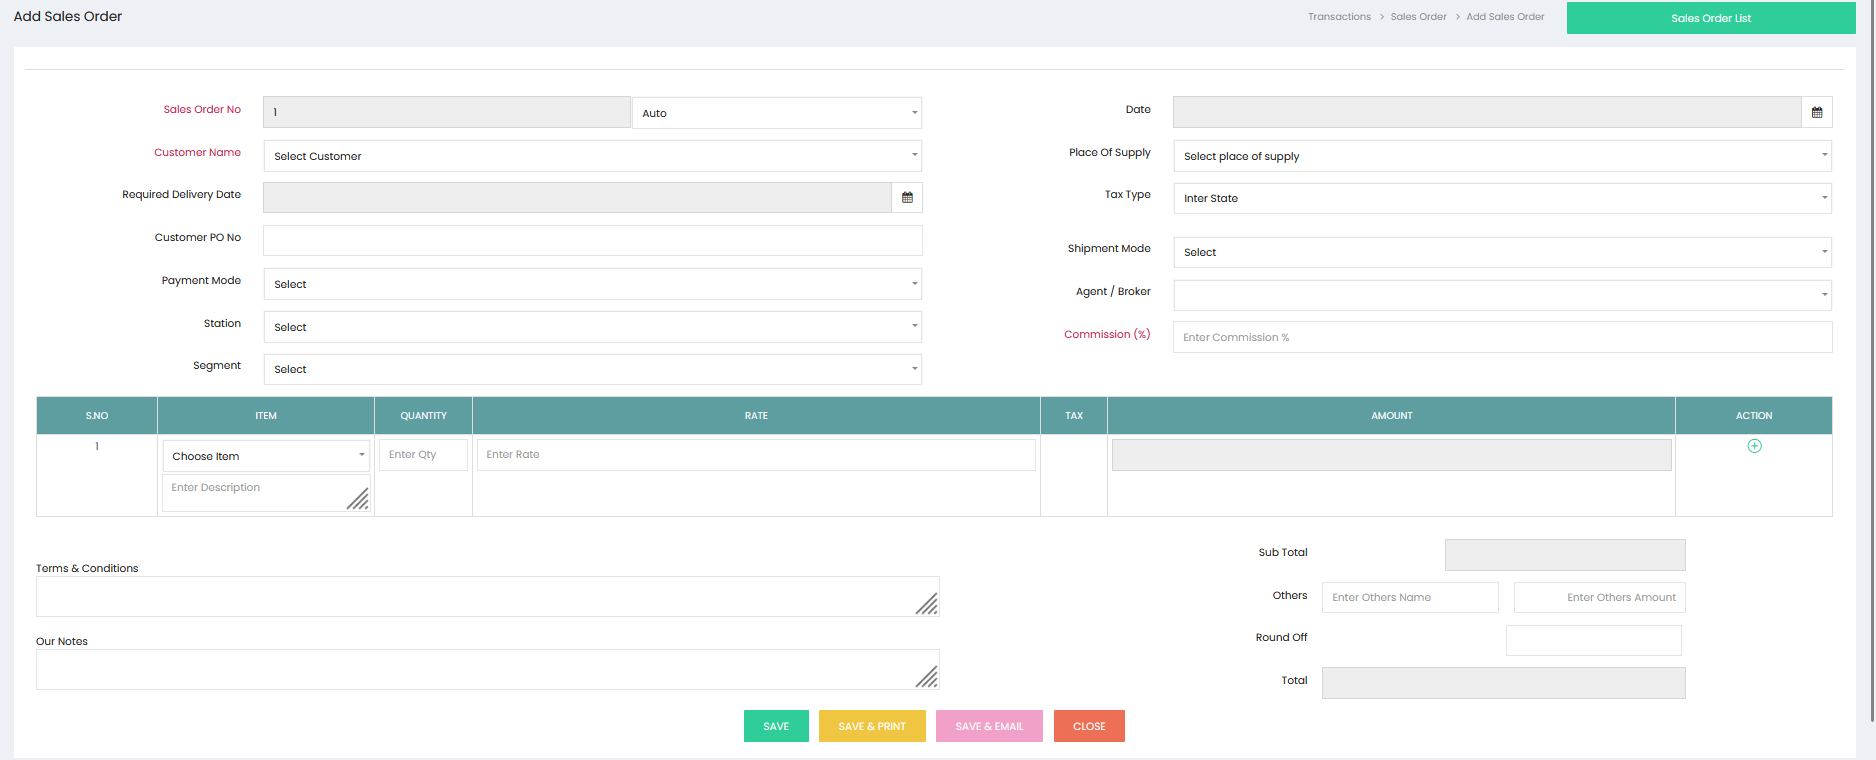
Click Add Sales Order to open the Sales Order entry screen.
Step 1: Enter Basic Information
Fill in the following information.
| Field | Description |
|---|---|
| Sales Order No | Displays the Sales Order number. |
| Numbering Type | Select the numbering method. |
| Date | Select the Sales Order date. |
| Customer Name | Select the customer. |
| Required Delivery Date | Select the required delivery date. |
| Customer PO No | Enter the customer's purchase order number. |
| Payment Mode | Select the payment mode. |
| Station | Select the station. |
| Segment | Select the segment. |
| Place of Supply | Select the place of supply. |
| Tax Type | Select the applicable tax type. |
| Shipment Mode | Select the shipment mode. |
| Agent / Broker | Select or enter the agent or broker. |
| Commission (%) | Enter the commission percentage if applicable. |
Step 2: Add Products or Services
Use the item entry table to add the products or services included in the sales order.
Each row contains the following fields:
- Item
- Description
- Quantity
- Rate
- Tax
- Amount
To add another line item, click the ? icon in the Action column.
Repeat until all required items have been entered.
Step 3: Enter Additional Information
The following text areas are available:
- Terms & Conditions
- Our Notes
Enter any additional order information if required.
Step 4: Review Order Totals
The summary section displays:
- Sub Total
- Others (Name)
- Others Amount
- Round Off
- Total
Review the calculated totals before saving.
Step 5: Save the Sales Order
After verifying all information, choose one of the available actions:
- Save – Saves the Sales Order.
- Save & Print – Saves the order and opens it for printing.
- Save & Email – Saves the order and prepares it for email.
- Close – Closes the screen without saving.